Crotchet Santa - because I couldn't find a cute Santa in the store.
My mantle looks complete now
Wednesday, December 2, 2015
Sunday, November 29, 2015
Monday, November 23, 2015
Sunday, November 22, 2015
Xmas cones - Crafts with my kids
Tuesday, November 17, 2015
Appliance handle covers DIY
Used a microfiber dish-towel. Cut it in the size I wanted, doubled it for max padding :) Either sew on Velcro along the edges or sew on some longer strips, so you can tie it.
No more water drippings on my nice stainless steel appliances.
I did the same cover - same size for my fridge as well.
Maybe for the holidays some holiday-themed covers? Who knows, endless options and affordable dish-towels are always at the $-tree.
Have fun and happy "less" cleaning your appliances.
Wednesday, November 4, 2015
Thursday, October 8, 2015
Halloween DIY ornaments
Wednesday, August 5, 2015
Friday, July 24, 2015
Lalaloopsy wall decals
Party wall decoration easy made out of construction paper.
Just cut some shapes and glue them on with glue stick. Markers for the eyes, lips and cheeks.
Taped them on the wall.
Wednesday, July 22, 2015
Saturday, July 11, 2015
T-shirt-Pillow fast project
Because it's so difficult to let go of your child's favorite T-shirt - I made a pillow out of it.
I sown the bottom inside out up. The arms from the outside. I stuffed the pillow- filling through one arm-hole and sown it up. Took me 10 minutes this project. Daughter loves it.
Posted via Blogaway
Monday, June 29, 2015
Monster High Pictures for my daughters room
I love redecorating my kids room. My daughter loves Monster High and Ever After High. So, this time I painted some Monster High profile pictures for her room.
First I looked at the pictures online - together with her, sketched them, painted with Acrylic and outlined them. I either outline them with a fine brush - using Acrylic black paint or I just wait til paint is dry and just outline using a sharpie. Easy breezy.
She loves her new art.
Wednesday, June 24, 2015
Sunday, June 21, 2015
Crotchet Shopkins pouch "Srawberry kiss"
For some shopkins storage I created a crotchet Strawberry-kiss-bag. Tiny strip of Velcro sewn on, will hold them inside together safe and sound :)
Friday, June 19, 2015
Tuesday, June 9, 2015
Friday, June 5, 2015
Wednesday, June 3, 2015
Wednesday, February 18, 2015
Friday, February 13, 2015
DIY Top-Down/Bottom-up Roman Shades
My Supply-List:
1/4 inch Dowels for the ribs. Bought mine at HomeDepot (around .93 $ each for Pine) 48/49 inch long
1 Dowel (thicker than the 1/4 inch. This will be for the top part of the shade: Top-Down part)
Eye-screws
Wooden-board 3/4 x 2 1/2 inch
Pole Sockets (I chose the wooden ones)
Corner-braces 1-1 1/2 inch
1 Cord-Lock
1 Tassel
Cord (i bought a 25ft package)
Rib-tape
Fabric (decorative for the inside) I chose tan-colored canvas
white or whiten out Fabric (for the side that's facing out the window)
This is my inspiration for a TopDown/BottomUp Roman shade!!
It is not perfect and it's my first time doing this kind of shade's and I am not a professional seamstress.
Cutting the fabric
My project
After I cut the white fabric, I cut the Canvas-fabric (that's the kind I chose for my decorative side) same measurements
I sew up one side, Length-wise and left a slit open. That is going to be on both sides and I will slide my wooden board through it.
Yes, the canvas is not easy to sew with. It frays very easy. But nothing, I can't handle :)
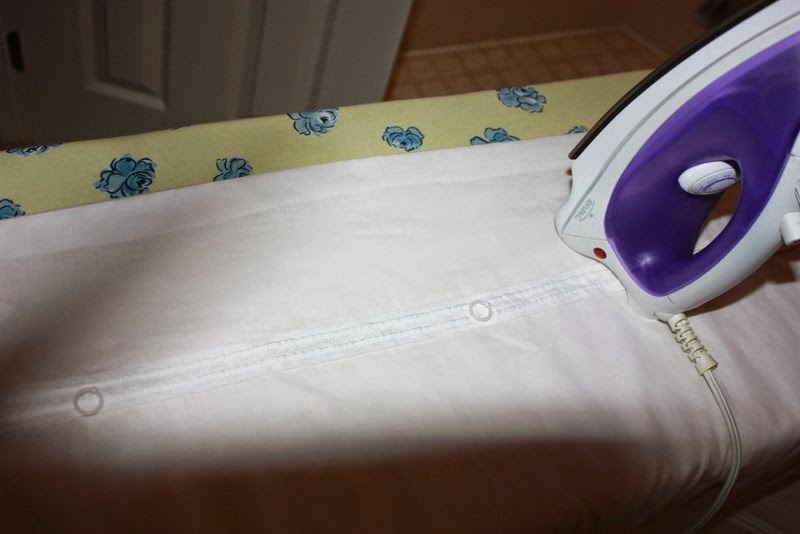
One of many ironing's..
Time to sew on some Ring-Tape.
Iron it .. AGAIN... sigh.. and sew up the other side.. the Length-wise part
Sewing 2 hems.. (measure your wooden-board's height's and give it an 1/2 to an extra inch) so the wooden-board can sit snug in it.
Sewing a loop for the Top-Dowel.
Now I will sew the rib-tape, which I will sew through both of the fabrics, so the seem will be seen on both sides.
!! Note: I was sewing with a white thread and the bobby had the canvas-colored thread in it. Worked fantastic.
The rib-tape frays very easy, so I am using some clear nail-polish. Will stop the fraying :)
Wooden-board sits nice in it.
Eye-screws
Cord-Lock installed
Installing the board on the window-frame
The wooden pole-sockets
Top-down/bottom up.
I made a cute bow on top of the board. After all, it's in daughters bedroom, so we have to make it even cuter
Top down
My husband has not installed 2 more sockets on the lower part. The top-part of the shades is just laying on the wooden part, when on Top-Down position. We might install 2 more sockets later. So far, we are liking the look like that.
-
I have looked all over DIY-site's to find instructions or idea's for TopDown/BottomUp Roman Shades and have not found very much inf...


